This guide helps you begin using DocsAutomator in minutes. It assumes you’ve already created an account at app.docsautomator.co .
1. Create New Automation After logging in, you’ll see the initial dashboard. Click the ”+ New Automation” button to begin setting up document generation.
An automation combines your data source (Airtable, Google Sheets, etc.) with a template — either a Google Doc or a PDF template.
2. Set Title & Choose Data Source Select your data source from the available integrations:
Depending on your selection, you may need to connect your account.
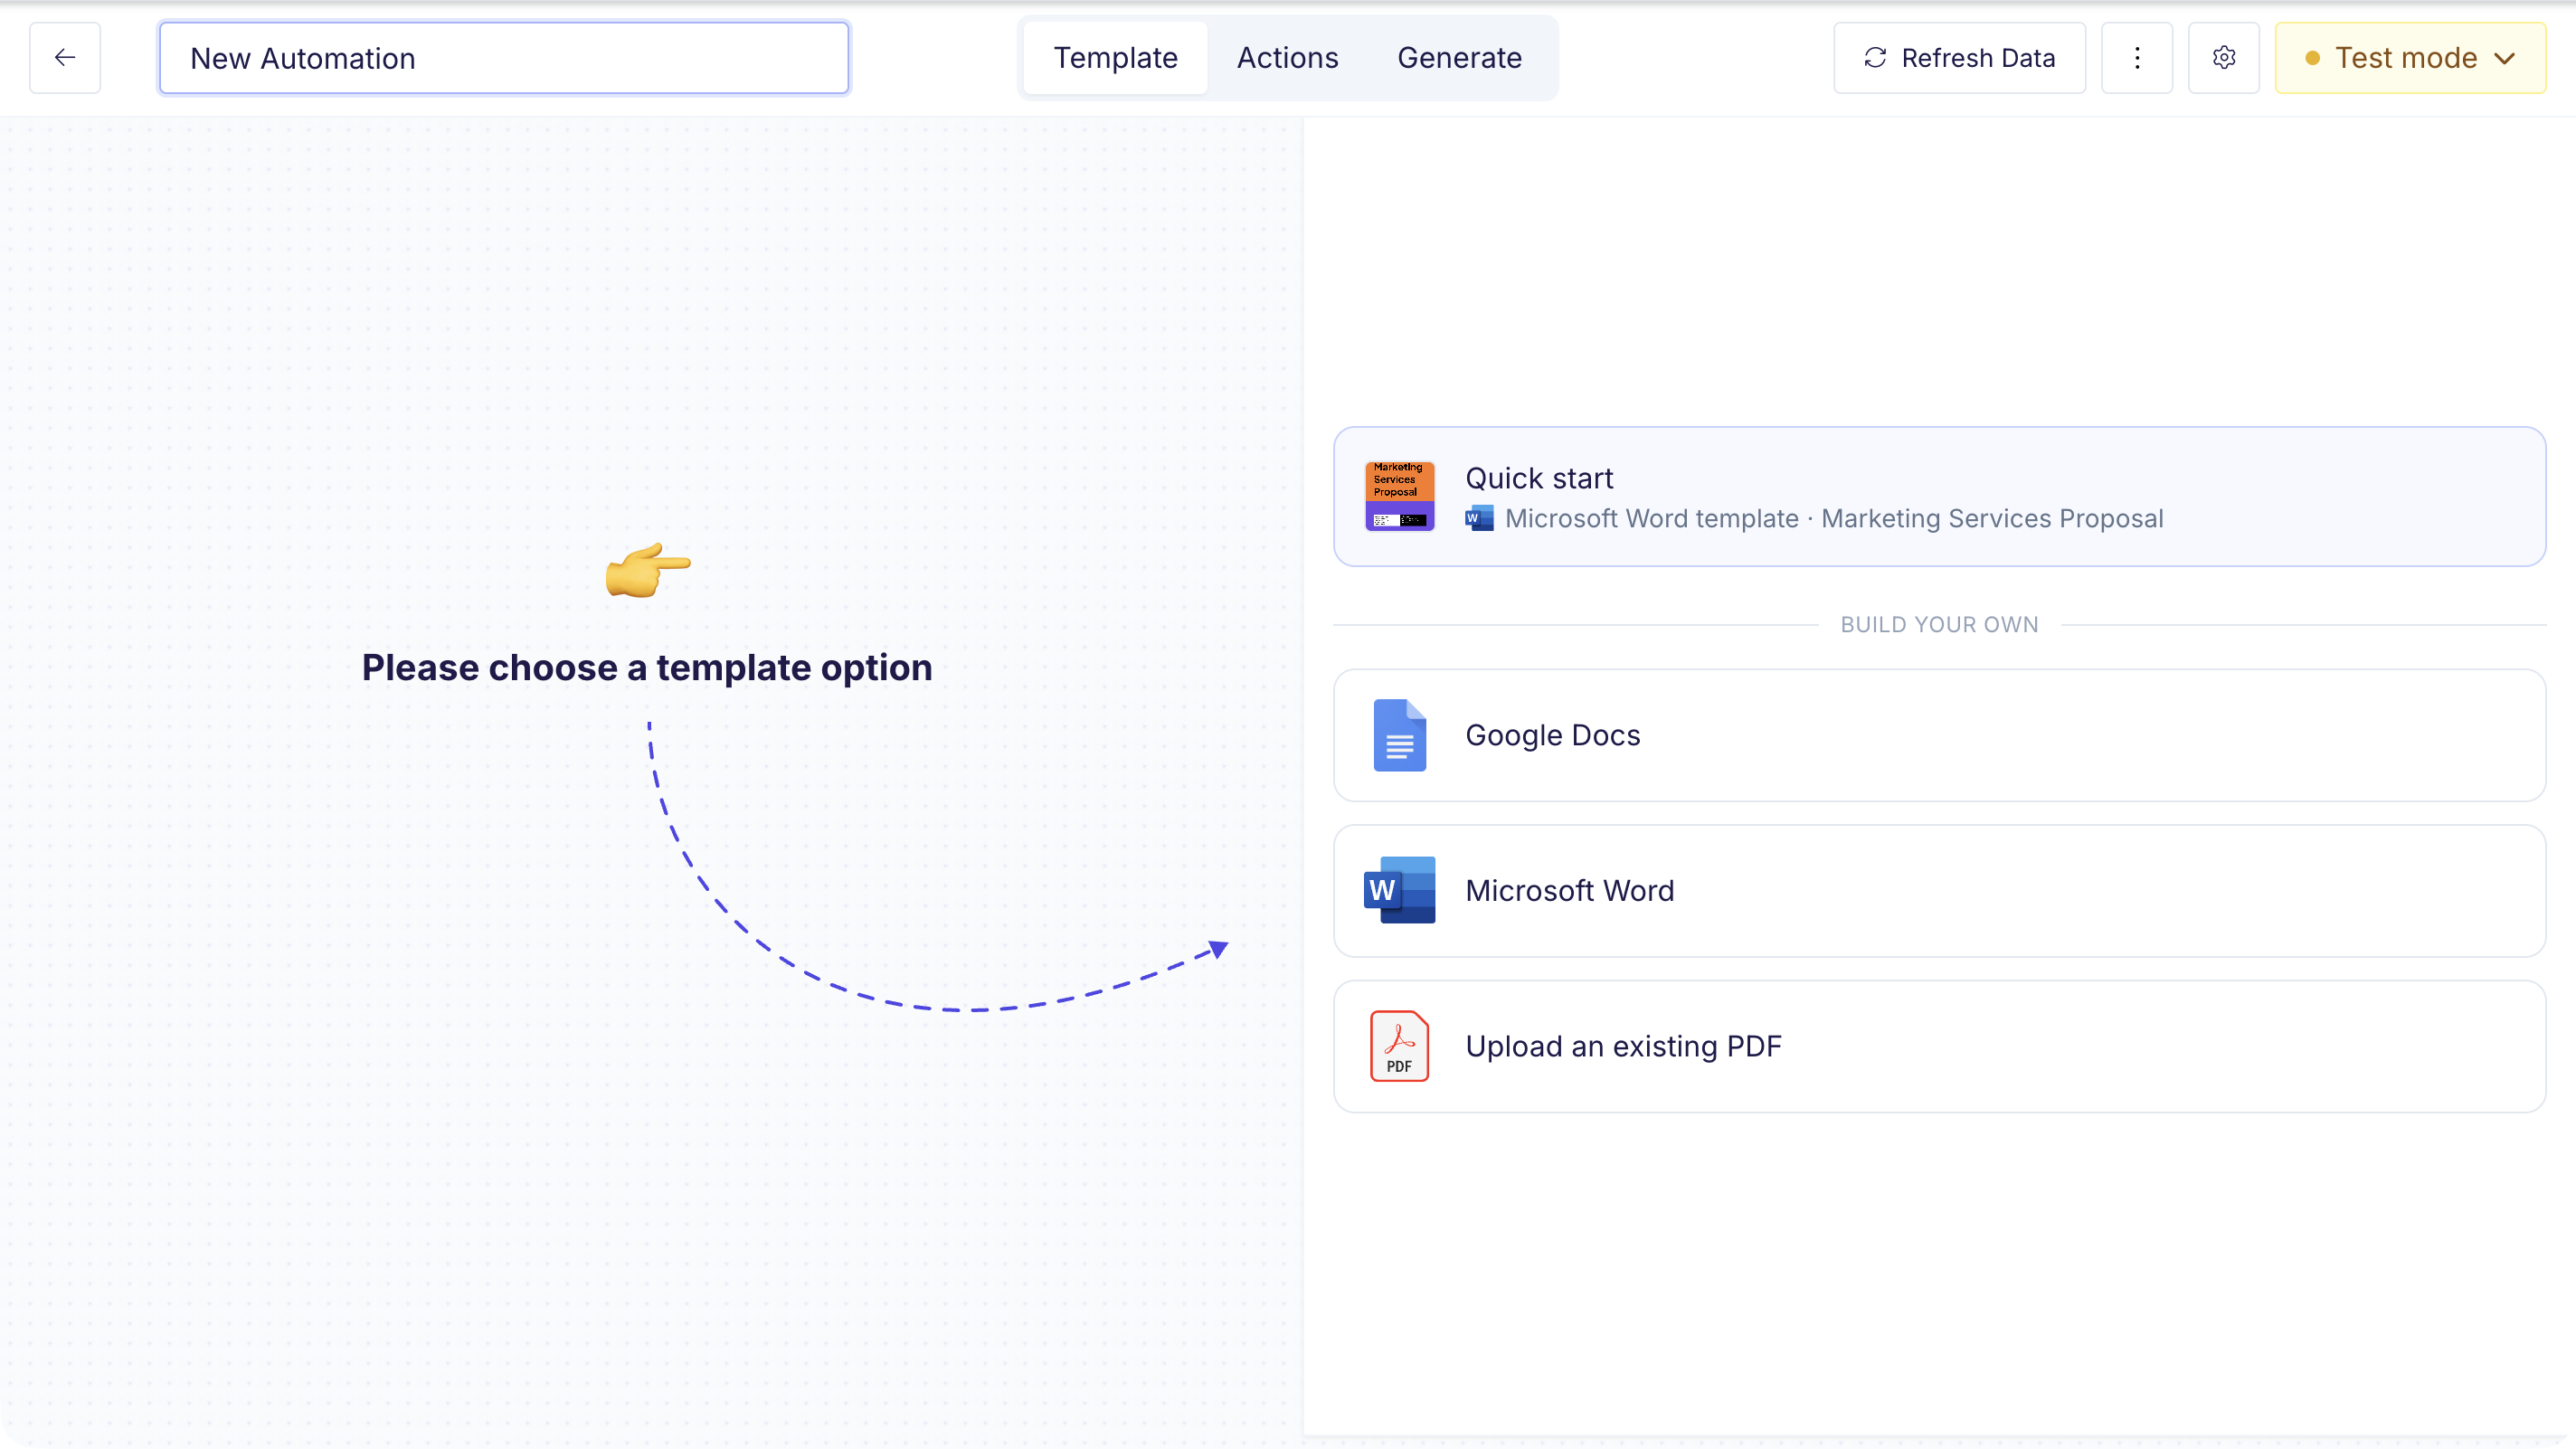
3. Choose Document Template DocsAutomator supports two template types:
Google Doc Template
PDF Template
Create a Google Doc with placeholder syntax ({{field_name}}). Best for text-heavy documents like invoices, contracts, and reports.
Add the Playground Template
Use the built-in playground template to learn interactively and test the placeholder syntax before building your own.
Select from Template Library
Use a Word (.docx) Template
Prefer Microsoft Word? Choose Microsoft Word as the template type, then upload your .docx, pick a Word gallery design, or generate one with AI. See the Word Template Guide for details.
Request Professional Template
Need help? Request professional template creation through our service form . Upload an existing PDF and use the visual editor to define where data fields should be overlaid. The PDF itself is not modified — DocsAutomator fills in the fields on top of your original layout at generation time. Best for pre-designed forms, certificates, or branded documents. See the PDF Template Guide for full setup instructions. 4. Map Data, Create Previews & Start Automating Select your base and table, then map your template placeholders to your data source fields.
Once mapping is complete, generate a preview to verify your document looks correct.
Set up what happens after a document is generated — save PDFs, send emails, merge documents, collect e-signatures, and more.
Want to collect signatures? Enable e-signatures in your automation’s output settings. See the eSign guide for setup instructions. The configuration process differs by integration:
Airtable
Notion
Glide
Noloco
ClickUp
Google Sheets
SmartSuite
Zapier
n8n
Make
Softr
API
Select Base and Table
Choose your Airtable Base and the Primary Table containing your data
Configure Output
Set the document name field and attachment field where PDFs will be saved
Map Placeholders
Map template placeholders to your Airtable fields
Generate Preview
Create a preview to verify the output looks correct
Set Up Automation
Configure document creation using webhooks or automation scripts within Airtable
Connect Notion
Authorize DocsAutomator and pick the workspace and database containing your data
Configure Output
Set the title property and (optionally) the file property where PDFs will be saved back
Map Placeholders
Map template placeholders to your Notion database properties — or to the page body as Markdown
Generate Preview
Create a preview to verify the output looks correct
Set Up Automation
Trigger document creation from a Notion button (requires Notion Plus or higher)
Set your automation to “preview mode” while testing.
Add Integration
Add the DocsAutomator integration in your Glide app settings
Configure Credentials
Provide your API key and account email
Add Action
Configure the DocsAutomator action and add your automation/template ID
Map Values
Map values from your Glide data to template variables
Define Output
Set the PDF output field in your Glide data
Set your automation to “preview mode” while testing.
Connect Account
Connect your DocsAutomator account in Noloco settings
Create Workflow
Create a workflow and select “Generate a document with DocsAutomator”
Choose Automation
Select your DocsAutomator automation
Map Fields
Map template fields to your Noloco data
Add Follow-up
Add a follow-up action to save the generated PDF
Select Workspace
Choose your ClickUp Space and List
Map Placeholders
Map template placeholders to ClickUp fields
Generate Preview
Create previews to verify the output
Configure Webhook
Copy the webhook URL and configure it in ClickUp Automations
Select Spreadsheet
Choose your Google Spreadsheet and the Primary Sheet containing your data
Configure Columns
Set the Primary Column, Document Name Column, and PDF Link Column
Map Placeholders
Map template placeholders to your sheet columns
Generate Preview
Create a preview to verify the output looks correct
Set Up Trigger
Choose between Auto-Create on new rows, webhook formula, or Apps Script
Select Solution and Table
Choose your SmartSuite Solution and the Table containing your data
Configure Output
Set the document name field and attachment field
Map Placeholders
Map template placeholders to your SmartSuite fields
Generate Preview
Create a preview to verify the output
Set Up SmartSuite Automation
Configure a SmartSuite automation with the DocsAutomator action
Create a Zap
Start a new Zap and choose your trigger app and event
Add DocsAutomator Action
Search for DocsAutomator and select “Create Document”
Connect Account
Provide your API key and account email
Select Automation
Choose the automation to use for document generation
Map Fields
Map your trigger data to the template placeholders
Install Community Node
Install the DocsAutomator node from the n8n community nodes panel
Add Credentials
Configure your API key and account email in n8n credentials
Add DocsAutomator Node
Add the node to your workflow and select “Create Document”
Configure Parameters
Select your automation and map placeholder values
Create a Scenario
Start a new scenario and add your trigger module
Add HTTP Module
Add an HTTP “Make a request” module for the DocsAutomator API
Configure Request
Set the API endpoint, authorization header, and request body
Map Data
Map your trigger data to the template placeholders in the JSON body
Add Integration
Add DocsAutomator in your Softr app’s integrations settings
Configure Credentials
Provide your API key and account email
Create Workflow
Create a Softr workflow with the DocsAutomator action
Map Fields
Map your Softr data fields to template placeholders
Set Output
Configure where the generated PDF will be stored
Get API Key
Find your API key in the DocsAutomator dashboard settings
Send POST Request
Send a POST request to the /createDocument endpoint with your automation ID and data
Handle Response
Receive the PDF URL and optional Google Doc URL in the response
Need Help?
In-App Chat Use the chat feature in your dashboard for quick assistance